In this short tutorial, we will explain how to configure Email Plugin to distribute alarms to recipients via email. We will use Live Demo Thignsboard server and SendGrid SMTP API in this tutorial. The Email plugin implementation is based on Java Mail and may be easily configured to other mail servers.
SMTP server parameters
Step 1. Get your SendGrid account.
We assume you have SendGrid account. You can sign-up for trial using this link.
Step 2. Configure SMTP Relay
Once logged in open SMTP relay configuration page. Follow instructions on the page to get the API Key. Save the API key somewhere.
Plugin Configuration
Step 3. Login to Live Demo server
Login to Live Demo server using Tenant Administrator account (the one that you created during sign-up).
Step 4. Create new Mail Plugin instance
Open Plugins page and click on big red “+” button. Populate plugin name and description.
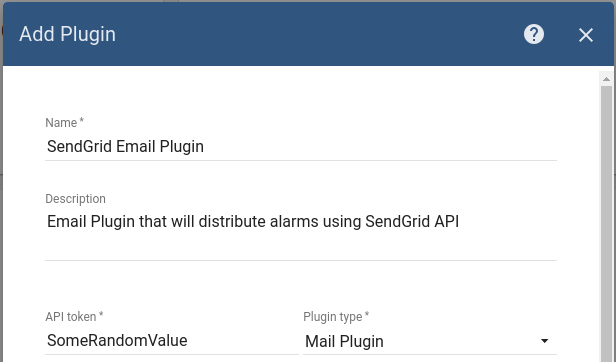
Once you choose the corresponding plugin type, the form will expand. Populate values as shown below. Use API key as a password.
NOTE Since demo instance is hosted on Google Cloud, you need to specify 2525 port. All other SMTP related ports are blocked.
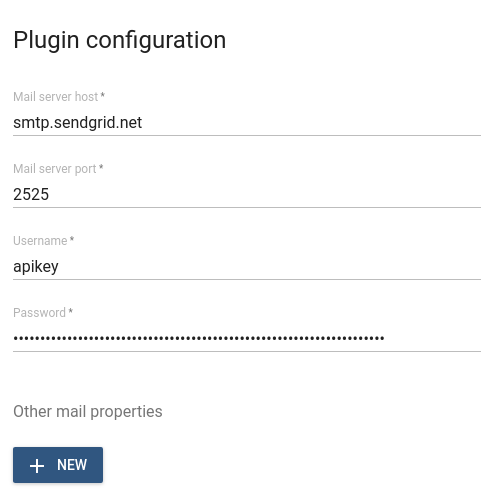
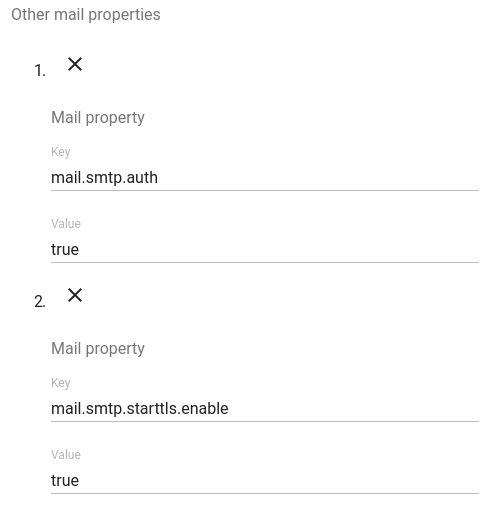
Don’t forget to add other email properties that will force a secure connection.
Click on “Add” button.
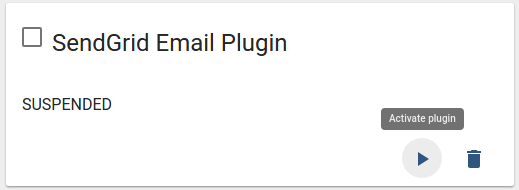
Step 5. Activate new plugin
Once a plugin is saved successfully, don’t forget to activate it by clicking on “Activate” button.
Next Steps
Explore next tutorial to provision basic rules and generate emails based on sensor readings.
Troubleshooting
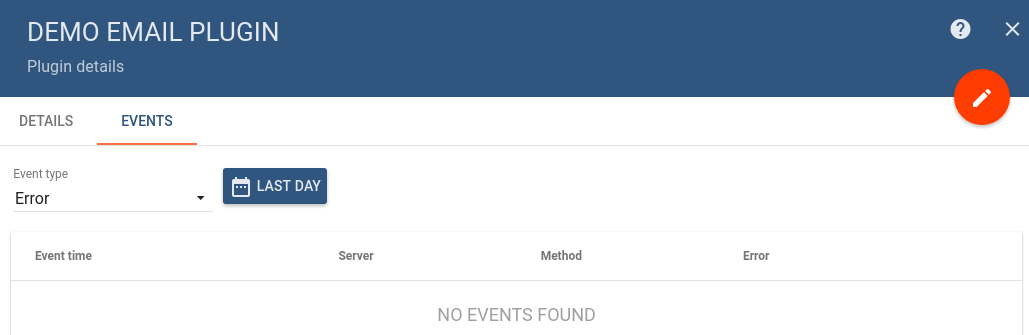
Once you configure your plugin and corresponding rules, you may review statistics and events on plugin details page. If you have configured something wrong, you should see errors logged on the corresponding tab: