- Introduction
- Prerequisites
- Wiring scheme
- Programming the Raspberry Pi
- Application source code
- Data Visualization and Control
- See Also
- Your feedback
- Next steps
Introduction
IoT Hub is an open-source server-side platform that allows you to monitor and control IoT devices. It is free for both personal and commercial usage and you can deploy it anywhere. If you are not familiar with the platform yet, we recommend to review what is IoT Hub page and getting started guide at first and then proceed with this tutorial. Within this guide we use iothub.magenta.at.
This sample application will allow you to collect information from sensors and control Servo, Led of your Raspberry Pi device with Grove Base Hat PCB using IoT Hub web UI. The purpose of this application is to demonstrate IoT Hub and Grove Base Hat PCB integrations.
Raspberry Pi will use simple application written in Python for connecting to IoT Hub server via MQTT, sending information from sensors and listening to RPC commands. IoT Hub built-in dashboards will be used for data visualizing and controlling Servo and Led as well.
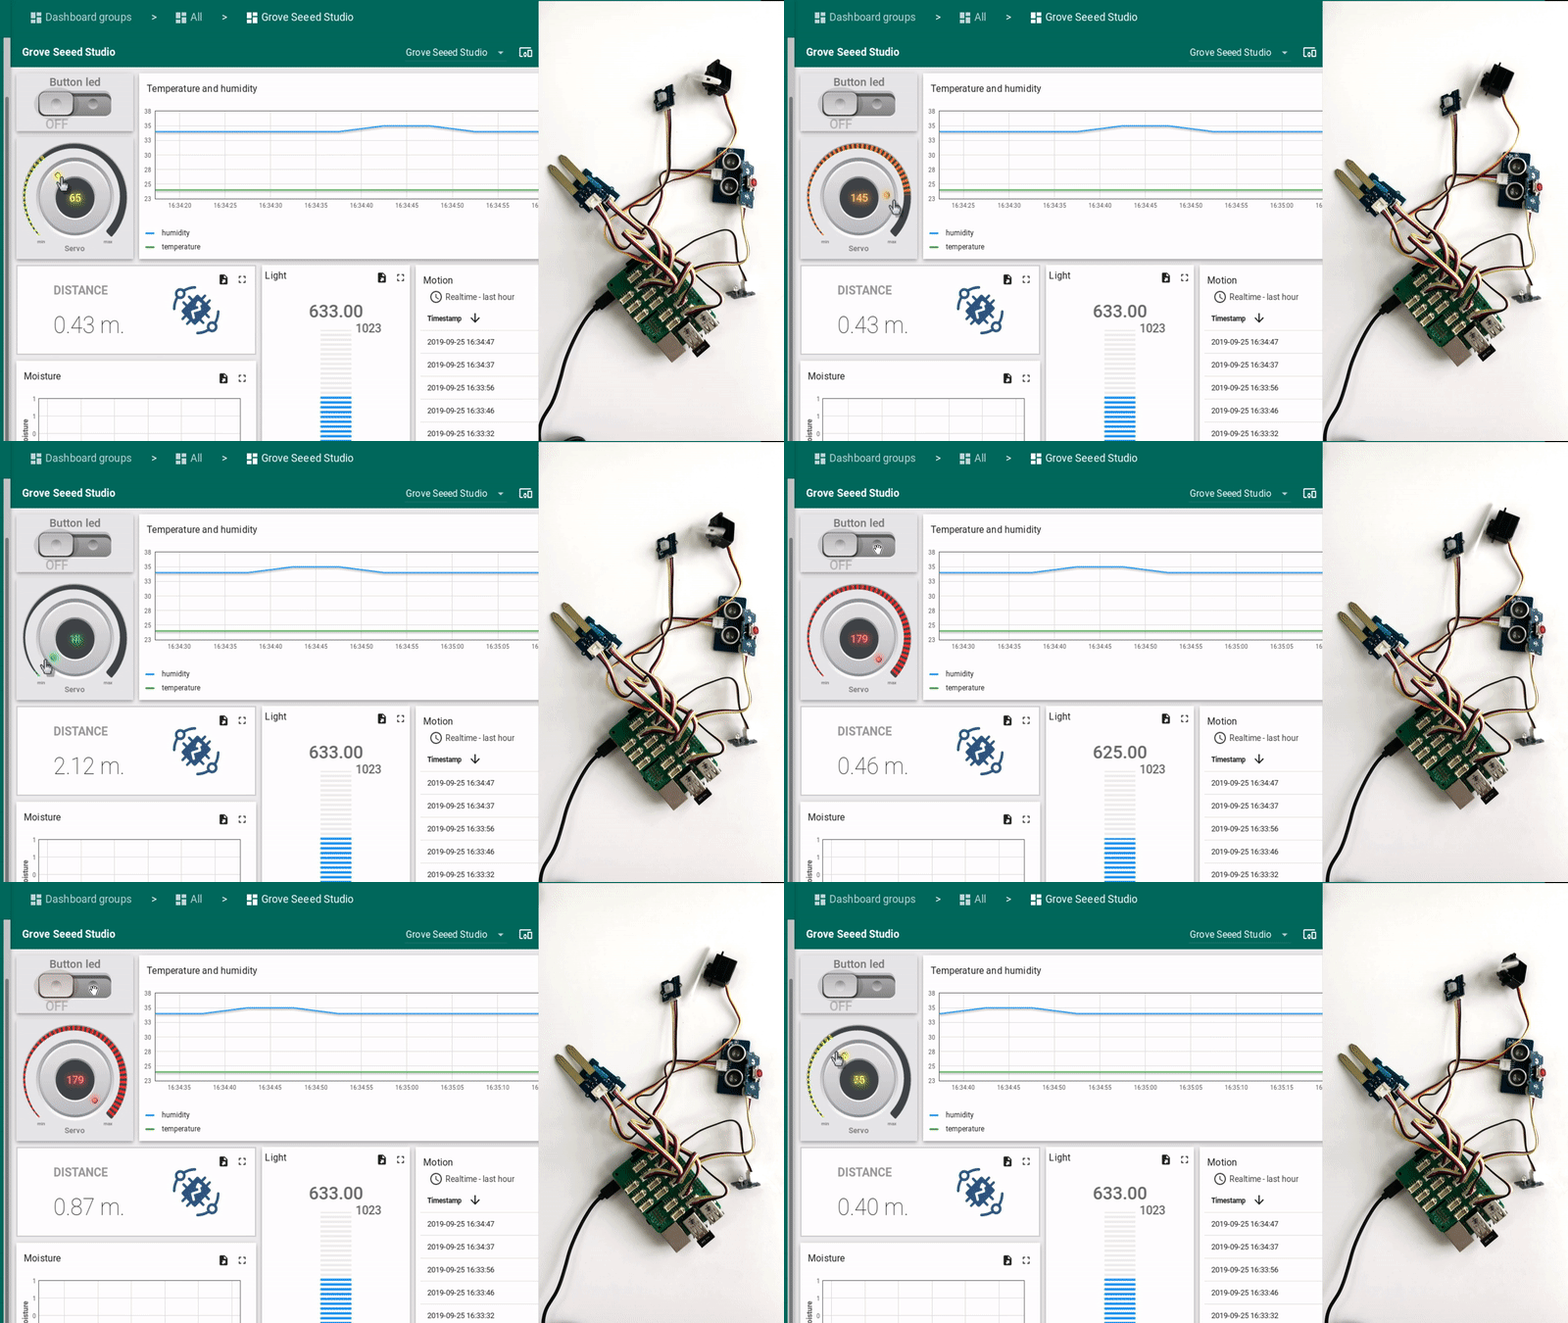
At the end we will get the following result:

Prerequisites
For the purpose of this tutorial you need IoT Hub server up and running. Within this guide we use iothub.magenta.at
Hardware and pinouts:
Raspberry Pi 3 model B (You can also use Raspberry Pi 4)
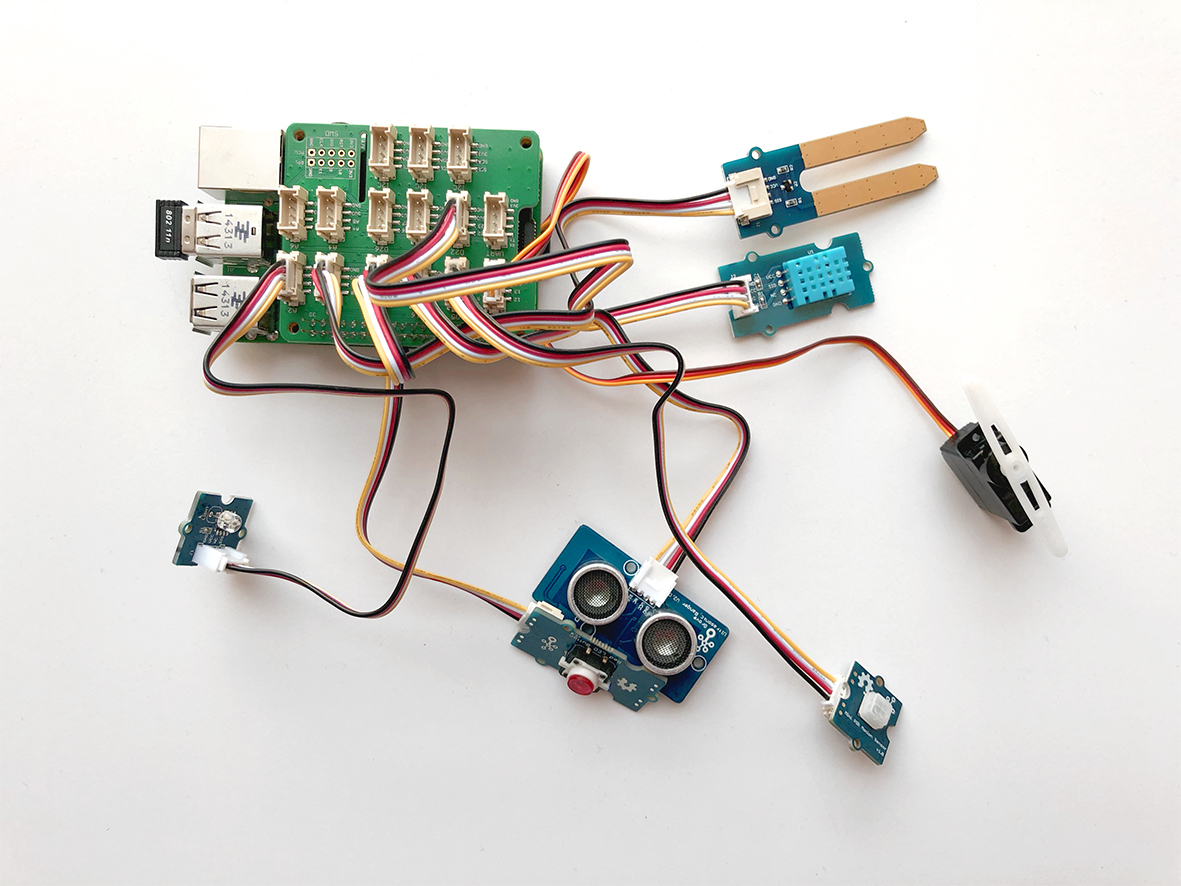
In our case we connect following modules:
- Analog Servo
- Mini PIR Motion Sensor v1.0
- Ultrasonic ranger v2.0
- RED Led Button v1.0
- Moisture Sensor v1.4
- Light sensor v1.2
- Temperature&Humidity Sensor v1.2

Wiring scheme
We use following wiring scheme:
1
2
3
4
5
6
7
8
9

Module                              Pinouts on Grove Base Hat
Analog Servo                        PWM(12)
Mini PIR Motion Sensor v1.0         D5
Ultrasonic ranger v2.0              D16
RED Led Button v1.0                 D18
Moisture Sensor v1.4                A0
Light sensor v1.2                   A2
Temperature&Humidity Sensor v1.2    D22
Programming the Raspberry Pi
By first we need to configure the Raspberry Pi. Please follow this article.
After the configuration we need to install libraries used in the script to the Raspberry Pi.
The following command will install iot hub python client sdk, it is used for communication with IoT Hub server:
1
pip3 install tb-mqtt-client
Also we need to install Seeed-Studio library to be able to connect our modules:
1
git clone git@github.com:Seeed-Studio/grove.py.git
1
pip3 install ./grove.py/
At last if you use Temperature and Humidity sensor (DHTXX), you also need to install the Library for Temperature and Humidity Sensor:
1
git clone https://github.com/Seeed-Studio/Seeed_Python_DHT.git
1
sudo python3 ./Seeed_Python_DHT/setup.py install
Application source code
Our application consists of a single python script that is well documented. You will need to modify THINGSBOARD_HOST constant to match your IoT Hub server installation IP address or hostname.
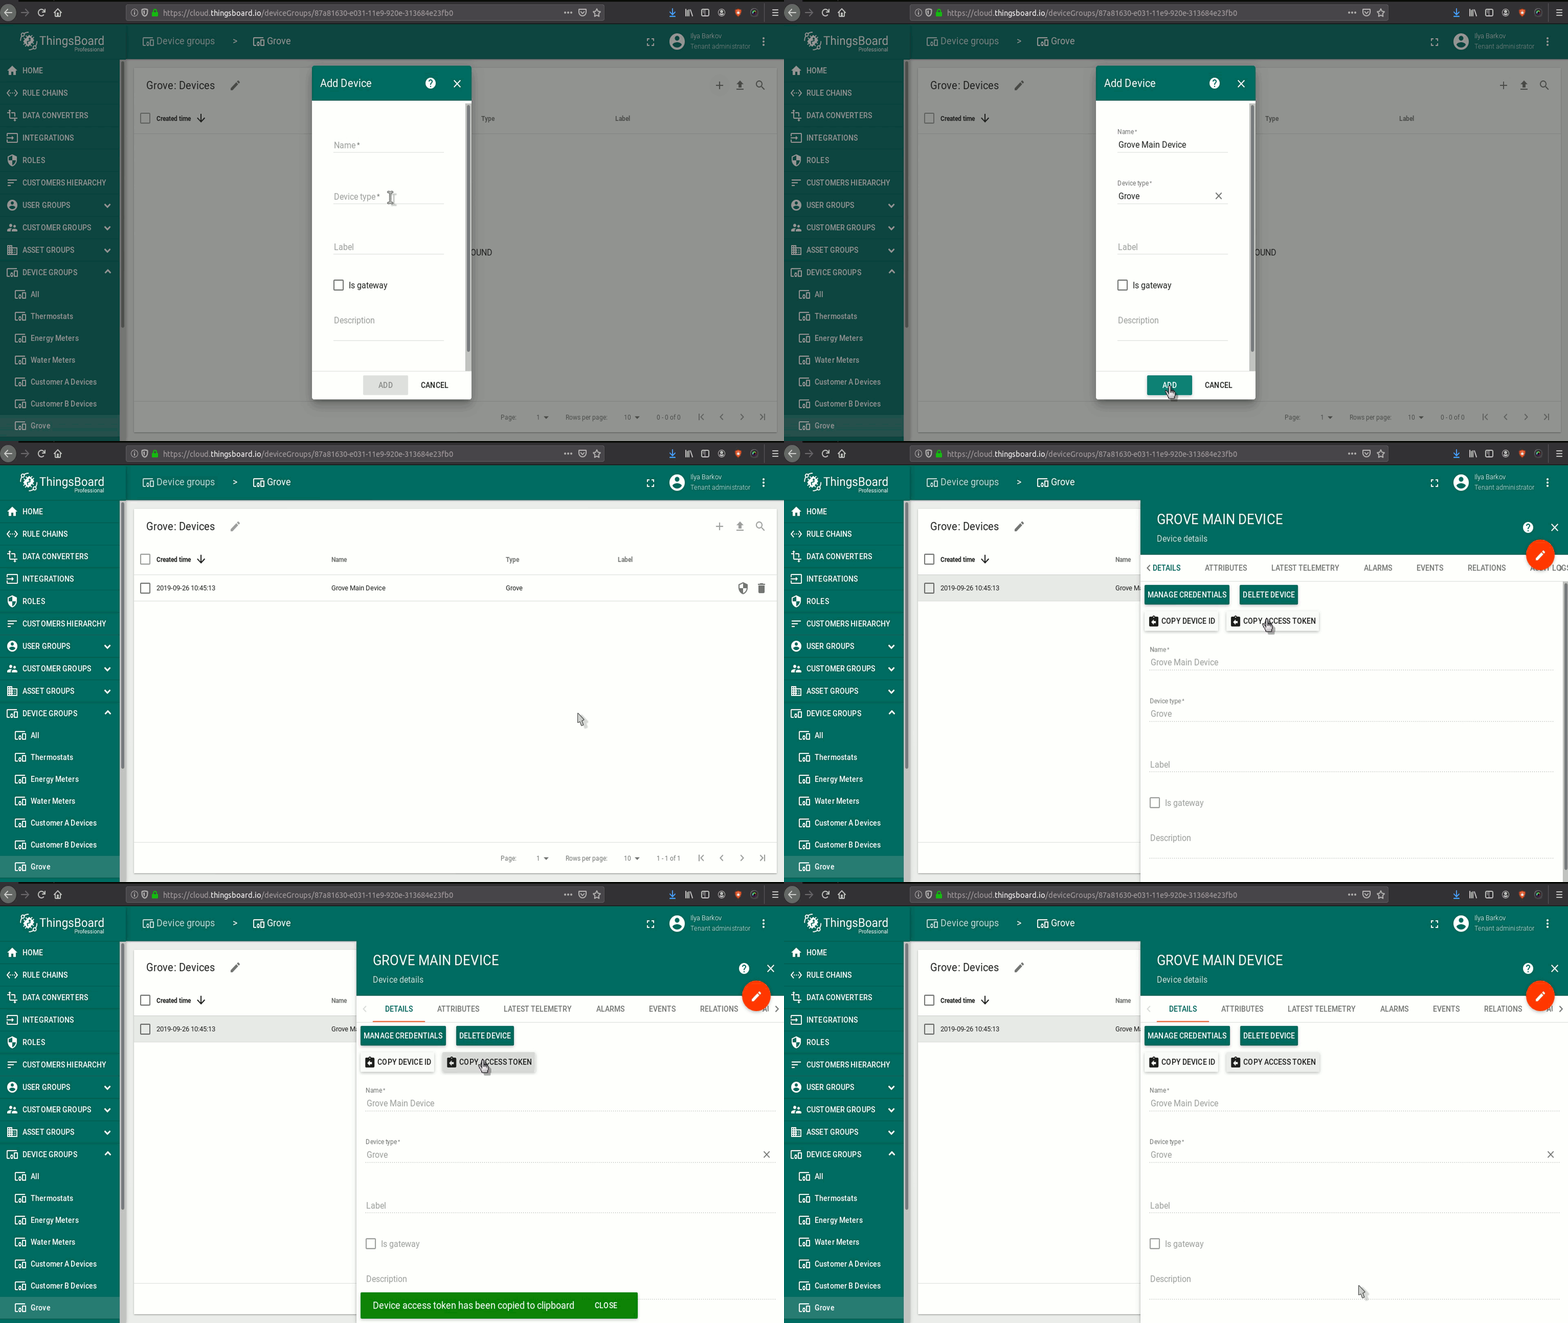
Also we need say to IoT Hub that we want to connect this device and get the device ACCESS_TOKEN, which will be used in the script. Log in to your environment — Device groups — Add device group — Add new device (e.g. Device 1 with type grove) — Open device details — Copy access token.

After this you need to replace the THINGSBOARD_HOST and ACCESS_TOKEN in the script below, with your values. In case you use Live demo, populate iothub.magenta.at as THINGSBOARD_HOST
Data Visualization and Control
To configure dashboard you should login into IoT Hub environment.
To proceed with this step, please download a grove_seeed_studio.json file, which contains preconfigured dashboard for this script. Once logged in, open Dashboards, click on the plus button in the bottom right corner of the screen and select the “Import dashboard” icon. Select recently downloaded file of dashboard configuration. Now you must edit the alias of Grove widget you should do this by pressing on the pen icon. Select the Filter type parameter as “Single entity”, set Type as “Device” and from the list of devices - select your GROVE device.
Running the application
This simple command will launch the application:
1
python3 tb_grove.py
The results of script running - you can see on the dashboard.

Also from dashboard you can control the servo (by rotating the knob control with name “Servo”) or the led (by pressing the trigger “Button Led”).
See Also
Browse other samples or explore guides related to main IoT Hub features:
- Device attributes - how to use device attributes.
- Telemetry data collection - how to collect telemetry data.
- Using RPC capabilities - how to send commands to/from devices.
- Rule Engine - how to use rule engine to analyze data from devices.
- Data Visualization - how to visualize collected data.
Your feedback
Don’t hesitate to star IoT Hub on github to help us spread the word. If you have any questions about this sample - post it on the issues.
Next steps
-
Getting started guides - These guides provide quick overview of main IoT Hub features. Designed to be completed in 15-30 minutes.
-
Connect your device - Learn how to connect devices based on your connectivity technology or solution.
-
Data visualization - These guides contain instructions on how to configure complex IoT Hub dashboards.
-
Data processing & actions - Learn how to use IoT Hub Rule Engine.
-
Advanced features - Learn about advanced IoT Hub features.
-
Contribution and Development - Learn about contribution and development in IoT Hub.
